Wednesday, August 29, 2012

DIY 6 of 26: Dated to Dashing - Chevron Lamp

On my recent staycation I did some Craigslist shopping and Devin and I headed out one evening to pick up an old mirror that I had plans of refinishing. The woman was also selling a very dated, traditional lamp that she agreed to include for $10 more! I did not have a full vision of it yet, but I figured I could transform it into something for my home so I took it! Here is what I was able to pull off:
When I was shopping around, both online and at second-hand stores, I found a lot of hideous lamps that, given a little makeover, could be super cute! The traditional lamp shade on this lamp is also readily accessible as the style is dated, but give it a modern chevron pattern and let us bring them "in" again. Here is how you can make your own...
Supplies:
  • An ugly lamp (The more ornate and decorative the better, when painted white it loses the traditional, or gaudy feel but the ornateness plays well with the light and shadows for visual interest.)
  • Ribbon - enough to go around shade (top/bottom) and each vertical line as well
  • Two colors of spray paint
  • Ruler
  • Hot glue gun and glue
  • Painter's tape
  • Large sheets of paper
  • Pen
#1:  Cover lamp cord, top socket, and any other portion you do not want painted. Depending on your lamp surface it may be best to rough it up with a light grit sandpaper and/or prime it with a spray primer. Then paint the entire lamp white with a high gloss spray paint.
#2: Remove all of the piping from the shade. It usually pulls right off with a little muscle but you might need to use a blade or something sharp if it is stuck.
#3: Trace a circle using the shade as a stencil on your paper and cut just inside the circle. Use the painters tape to adhere the paper and cover the inside of the shade from being painted. Then paint the entire shade white. I ran out high gloss paint and went with flat white paint for the shade. I was happy with how it turned out. I just heard about fabric spray paint this past week... I have not used it yet but I think it may have turned out even better, if you want to give it a try.
#4: This is the most difficult part of this process. Using the painter's tape, tape off your chevron pattern. Remember this is the portion that will remain your base color (in this case - white). There are different ways of doing this but here is how I did mine. The steps coordinate with the pictures above to help clarify my rambling! 1.) Measure 4.5 inches down from the points of the shade and mark with a small piece of tape. 2.) Place a piece of tape with the bottom point on the tape marker and then the other end on the next point on the shade. Do that all the way around the shade in one direction. 3.) Mark the top, on the tape, about .75 inch from the center on each piece of tape. This will make sure that your chevron point will end up centered on the points of the shade. 4.) Cut the end of the roll of tape square (90degree angle) and line it up with the bottom of the piece you have already laid down, then line up the bottom edge of the tape with the mark you make on the top and cut. Do this all the way around. 5.) For my pattern, I found it best to eye in the next chevron. Remember, it is just tape so if you mess it up, take if off and try again. Do that all the way around. 6.) Repeat steps 1-5 on the bottom to create the same pattern on alternating points.
#5.) Hang the shade from something and paint the entire thing with the second color of spray paint. Use multiple light coats for the best finished product. Remove the tape about 15 minutes after the last coat and then leave it to dry overnight.
#6.) Glue strips of ribbon on each vertical point of the shade with a hot glue gun.
#7.) Determine the back of the shade and starting there glue ribbon onto the top and bottom of the shade and allow to dry.
 
 There you have it! Do not be intimidated by the taping of the chevron. It was a little tricky but it was nice to be able to do it in tape first because you could redo it as many times as you needed and you have not messed anything up!!! I hope you enjoy your own hideous lamp transformations. Another benefit to this is that if you decide you are tired of your lamp shade you can always change it up as the lamp base is your blank foundation. Happy Wednesday all!

Friday, August 17, 2012

Lone Star

It is hard to believe we have been back home from Texas for over three weeks now! Time just keeps catapulting forward at a faster and faster pace it seems. We really had a wonderful time experiencing Lone Star culture and visiting with family, here are some more pictures of our trip.

The first day Devin had his exam (the purpose of the trip), and then we spend a few days resting and playing at my aunt and uncles house. Good food, hot weather, pool time, face masks, and s'mores were on the agenda. And just a tip: S'mores in 108 degree weather is a really bad idea!
I wanted to find a special project my cousin and I could do together and I found just the thing, thanks to Pinterest. Custom mugs for my aunt as an "I love you" gift were so much fun to create using colored sharpies.
Devin's college friend Andrew and his girlfriend live very close to my family and we were so happy they agreed to take us out to downtown Houston to see the city. We had the best BBQ of our lives, SO YUMMY! I went to my first real western store and got a cute pair of cowgirl boots, which I figured were a must in Texas. We ended our evening at the most adorable restaurant, Tiny Boxwood's. Luckily Andrew and Melissa had been there before and wisely cautioned us to save room for dessert. Their high-end, homemade doughnuts, fudge/peanut butter mouse cake, and cookies were worth the entire trip to Texas alone! Wow...if you are ever in the Houston area check this place out!
By the end of the week we decided it was time for one of Texas' most famous pastimes...the shooting range. My uncle has the coolest collection of assault riffles, shot guns, hand guns, etc. We did some damage to those targets and despite a gnarly burn and temps over 100degrees we had a blast! We stopped by Old Town Spring for some more BBQ and shopping. What a cute little town!
The last few days of our trip we had the added bonus of my mama and brother being in town. We finished our Texan adventure with some wonderful family time in the pool, going out, and of course lots of eating!
Marrying a doctor sounds glamours but marrying a medical student is far from. We realized during this trip how burnt out we both were and how desperately we needed time together. Our busy lives leave precious little time to just be together, chat, and relax. This trip was a well needed status check and was rejuvenating. Devin is back into the thick of his last year of courses, but we are trying to carry some of our vacation with us and take time to connect on a daily bases. Sometimes you have to get away to get a better perspective and refocus! Yay for vacation!

Tuesday, August 14, 2012

An A-mason-ing Chandelier

I recently went on a search for the perfect lighting piece to hang over my work table in the JJTulum studio. I could not find anything perfect so I commissioned my ever-clever husband to dream up something pretty and creative with a set of Mason Jars my mama gave me on my last trip home. Sure enough, he turned it into a masterpiece!!!
I was going to turn this into a DIY but with all of the electrical components I did not want to be responsible for anyone burning their house down so I will just show you a few of the steps and feel free to contact us if you want some more info...
As reclaimed wood was pathetically expensive we purchased pine boards from Home Depot and then took out all of our pent up frustration and stress on the them with hammers, a bag of screws, heavy chunks of wood, and anything else that would make intricate markings. One technique we found looked great was to place the head of a nail on the wood and hit the point with a hammer, then turn it around and drive the tip of the nail into the wood and pull it out again, giving it the look of old nails having been used before. Here's how it looked:
We used a wood plane and shaved off long strips of wood on the corners, using varying amounts of pressure to give it an uneven look. After sanding each board down we applied two different oil-based wood stains to give color texture and bring out the markings in the wood.
Our studio has taken on a bit of a country-shabby-chic-industrial feel...haha...how is that for combining styles. So being, leg bolts were a perfect industrial touch for the piece. Look how the stain made the nail holes look old too...
It was a very fun project to help with and the end product is even more than I imagined it would be! Take a look:
The radio bulbs give off such a warm light and while I teetered between spending the extra on funky bulbs or just using regular light bulbs, in the end they were totally worth it!

Friday, August 10, 2012

Staycation Finale

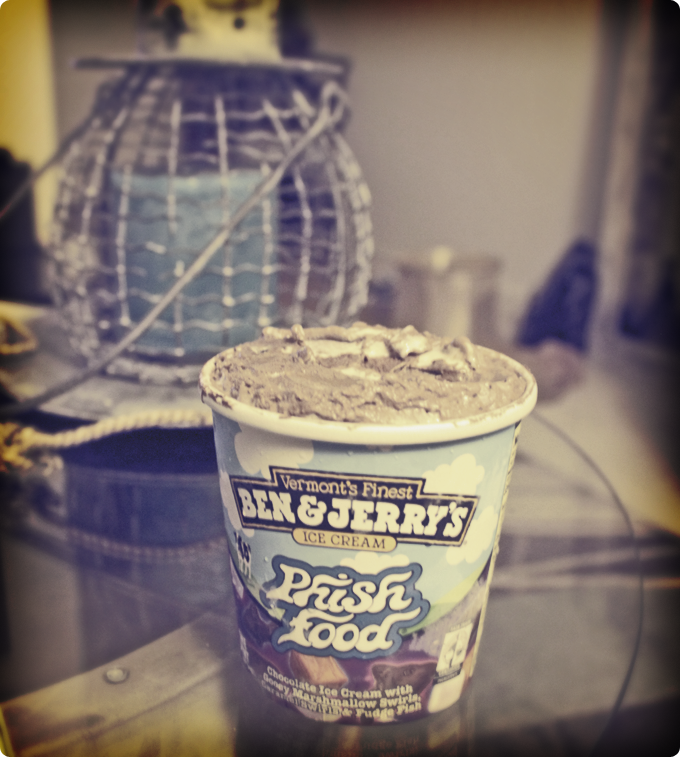
Well, that is all she wrote...my staycation has come to an end and I am back at work! This is time off was amazing, who could have thought going nowhere, doing nothing, and having no agenda could be so incredible! I actually worked very hard around the house and have some fun projects to share this next week, but here are some quick pictures of my time off. I finally planted my mini herb garden on my patio, watched countless hours of the Olympics and celebrated Devin's completion of his board exams with the oldest tradition in our relationship...Ben & Jerry's Phish Food!

We took multiple trips to the pool with ice cream cones in hand, tried new recipes, enjoyed the wildlife just steps from our back door (deer, wild turkeys, a myriad of birds, chipmunks, squirrels, and more), and worked on EIGHT huge projects. You can see from my garage that we were very busy bees! Most of them are complete so I will be posting soon...


While I am never ready to go back to work, I feel re-energized and ready to tackle anything! Haha! Happy Friday everyone!

Wednesday, July 25, 2012

Staycation Commencement

Today is the first day of my staycation!!! I worked last night so it was hard to drag myself out of bed this afternoon, but then it turned into a rather productive day. Can I share?...I have an awkward hallway at the bottom of my stairs that was painfully white. Being as we are renting and only planning on staying in this home for a year I am trying to not paint if at all possible. The problem is that I hate white walls. The other problem is that I dislike throwing away perfectly good things when I think that someday I could reuse them and make them something special; like 16 cheap, black frames that Devin and I have collected from our dorm/college years. Here is a visual of the problem at hand...
 The solution was to create a photo collage to eat up some space on my eternal white wall and find a creative way to use boring black frames that does not look cheap or "dorm-room-y". We found some of our favorite pictures from various adventures, birthdays, moves, our wedding, friends and family and turned them black and white giving it an artistic feel. The entire project cost less than $10.

A tip if you decided to do something like this yourself:
Take tissue paper and tape it together to create one large sheet. Play with your collage design until it is the way you like it. Then, lay the frames out on the tissue paper and trace around each, marking where the nails need to go to hang from the various fasteners on the back.
Then tape the tissue paper to the wall and put the nails where you marked for the frames. The tissue paper is easily removed and then all you have to do is hang your frames up and they are spaced exactly how you want them! Big time and stress saver!
 Here is how it turned out:

I was happy to have a project done on the first day. My day ended with an evening drive to the south Bronx to pick up an ugly mirror and lamp I found on craigslist. Next, I have to turn said ugly mirror and lamp into something pretty! I have my work cut out for me, here is what I have to work with:
 On our way back to the freeway we saw a street named "Casanova", so fun!
Good night all, tomorrow starts early with more projects! Chat soon!

Sunday, July 22, 2012

DIY 5 of 26: Placemat Bath-mat

After much searching I could not find a bathroom mat that I completely fell in love with for my new powder room, so I made one using circle place mats. And you can too, super cheap, super easy, super fast! Here is how...
Supplies:
  • Four Round Place Mats
  • Scissors
  • Pins
  • Non-slip Rug Pad
  • Thread/yard and a Needle/sewing machine (I used thread and a sewing machine, but you could create a more organic or boho look by using yarn! Super cute!)
#1: Line up the place mats so that each of them is on top on one side and underneath on the other side, forming a pinwheel look. Pin them down.
#2: Stitch them together. The black line indicates where to sew.
#3: Cut a piece of the non-slip rug padding so that it completely fits under the mat without showing from the top. Slide the pad under the mat and voilĂ , you are all set. Here are some pictures of how mine turned out!

Have fun and enjoy making your own colorful, unique bathroom mats. I found some gorgeous place mats at a discount store, made in India with beautiful designs and stitching in gold tread. They did not fit my plan for my powder room but they were so pretty. I am sure you can find some really interesting ones out there for a steal! The whole project cost less than $8, gotta love it!

Monday, July 16, 2012

A Month of Fullness

Hello All! What a month-and-a-half this has been. I thought I would share a few pictures and a quick update as to why I have been MIA in the blogging world.

Since May 29th I have...

Said goodbye to my first New York home of three years.
 Signed a new lease, giving me 1470sq feet of blank, white canvas to play with!!!
Headed to Seattle for a quick visit with my best friend her her lovely gentleman who were in town from the Ukraine. We took him for a rush tour of downtown and the market after some very satisfying WOW BubleTea -- a teenage-years must. I enjoyed some birthday celebration with my family and my sweet inlaws! My late great-grandfather and I were always birthday buddies; he has been gone five years now but our birthday tradition lives on! And of course a trip to Seattle could not be complete without seeing my baby brother's ("baby brother" is now over six feet tall) baseball game.
I returned from my Northwest whirlwind to have time to work and move before heading out again, we literally threw everything into our new place and packed a bag...so thankful for our wonderful friends who recruited others and helped us move in one afternoon!
With no rest for the weary we headed out to Houston, TX for Devin to take the first portion of his national boards exam. My aunt was beyond hospitable, allowing us the use of her home and car, not to mention feeding us and entertaining us for a week after!!! We jumped into Texas culture and enjoyed the most amazing food, weather, and of course the shooting range. I cannot wait to share more pictures of our trip later but here is a personal favorite...
Back home to get some of the unpacking and decorating started and then the privilege of hosting my best friend Megan for a busy 48hour layover on her way back to the Ukraine. She has started an English school for missionaries there over the past few years! Check out out her blog. She is truly an incredible person and I have always hoped to be just like her when I grow up!!! Friday evening we hit up Times Square and Broadway for a lovely girl's night out.


As if that were not enough to keep us busy: Devin has finalized his decision of medical specialty, I worked 18 twelve-hour shifts, we squeezed in two date nights, had to make a couple of difficult and emotional decisions, we bought a tree, and have been designing custom furniture, collecting the pieces, and assembling it for our new home! Nothing like a relaxing summer huh?! What have you been up to? Everyone I chat with agrees that time is flying -- hard to believe it is mid-July already! Whether you are lazing by the pool or running around like crazy I hope you have a lovely week!